In the fourth post on the experiences gained during the creation of a SharePoint farm in Windows Azure will look at establishing the domain controllers and active directory.
The previous three were:
- Creating a SharePoint Farm in Windows Azure
- Creating a Virtual Network in Windows Azure
- Creating a Base Image for use in Windows Azure
Most of the details in this post is really not Azure-specific. We are going to deploy a couple of VMs, but we have already seen how to do that in the last blog post. We are then going to promote these VMs to domain controllers and configure a new forest. If you know anything about infrastructure, you properly know more about this than I do. If not read on.
Open a Windows Azure PowerShell prompt. We first set the subscription name and storage account.
# your imported subscription name
$subscriptionName = “MySubscription”
$storageAccount = “mystorageaccount”
Select-AzureSubscription $subscriptionName
Set-AzureSubscription $subscriptionName -CurrentStorageAccount $storageAccount
We then set the image name, size of VM, location to store the VDH-file, what subnet to deploy the VMs into and finally the (local) admin password.
# Domain Controller Paramaters
$imageName = ‘a699494373c04fc0bc8f2bb1389d6106__Windows-Server-2012-Datacenter-201301.01-en.us-30GB.vhd’
$size = “Small”
$mediaLocation = “http://mystorageaccount.blob.core.windows.net/vhds/”
$subnet = ‘SP-ADSubnet’
$password = ‘P@ssw0rd’
The command to get a list of available images from the gallery is:
Get-AzureVMImage | Select ImageName
We are going to install the domain controllers into their own could service. It could just as well be the one containing the rest of the servers for the SharePoint farm, but I personally prefer to have them separately. Remember that the service name must be unique.
# Cloud Service Paramaters
$serviceName = “DC-Service”
$serviceLabel = “DC-Service”
$serviceDesc = “Cloud Service for DC for SharePoint Farm”
$vnetname = ‘SP-VNET’
$ag = ‘SP-AG’
The VNET and affinity group are the ones created during the creation of the VNET.
The configuration for the first domain controller. Notice that we add an extra disk to both VM. This if for the (AD) global catalog.
# Create VM Configuration (DC1)
$vmName = ‘sp-dc1’
$vmStorageLocation = $mediaLocation + “sp-dc1.vhd”
$dc1 = New-AzureVMConfig -Name $vmName ‘
-InstanceSize $size ‘
-ImageName $imageName ‘
-MediaLocation $vmStorageLocation |
Add-AzureDataDisk -CreateNew -DiskSizeInGB 20 -DiskLabel ‘data’ -LUN 0
Add-AzureProvisioningConfig -Windows -Password $password -VM $dc1
Set-AzureSubnet -SubnetNames $subnet -VM $dc1
Configuration for the second domain controller:
# Create VM Configuration (DC2)
$vmName = ‘sp-dc2’
$vmStorageLocation = $mediaLocation + “sp-dc2.vhd”
$dc2 = New-AzureVMConfig -Name $vmName ‘
-InstanceSize $size ‘
-ImageName $imageName ‘
-MediaLocation $vmStorageLocation |
Add-AzureDataDisk -CreateNew -DiskSizeInGB 20 -DiskLabel ‘data’ -LUN 0
Add-AzureProvisioningConfig -Windows -Password $password -VM $dc2
Set-AzureSubnet -SubnetNames $subnet -VM $dc2
And finally we execute the New-AzureVM command.
# Create the DCs
New-AzureVM -ServiceName $serviceName -ServiceLabel $serviceLabel ‘
-ServiceDescription $serviceDesc -AffinityGroup $ag -VNetName $vnetname -VMs $dc1, $dc2
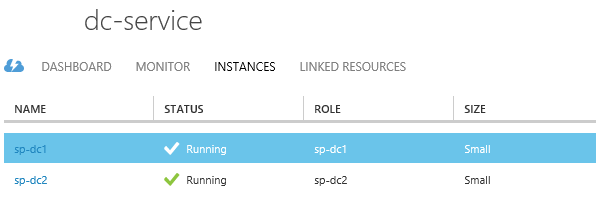
If all goes as expected we will have two new VMs. Looking under virtual machines in the Management Portal should give us something like the following:
Under Disks you can see that the extra data disk has been deployed as well as the OS disk.
And if you look under Cloud Services
The next step is to attach and format the data disk.
Open a remote desktop connection in to SP-DC1.
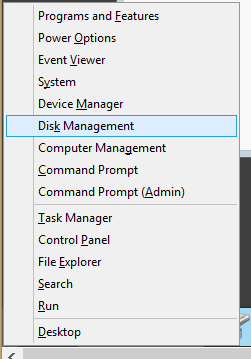
Go to Disk Management
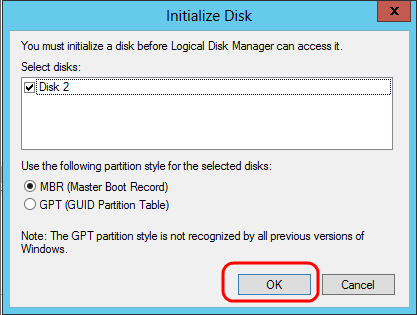
The Initialize Disk dialog will pop up
Ensure the Disk is selected and press OK.
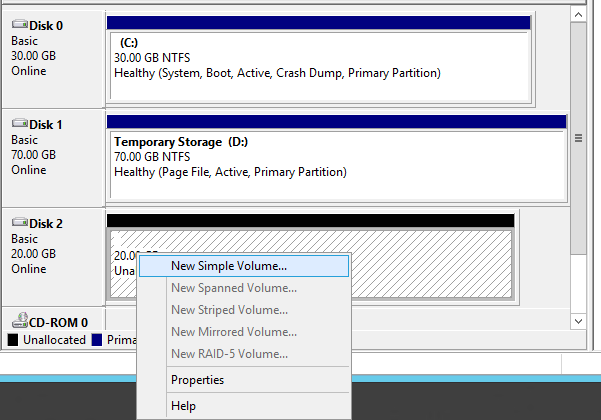
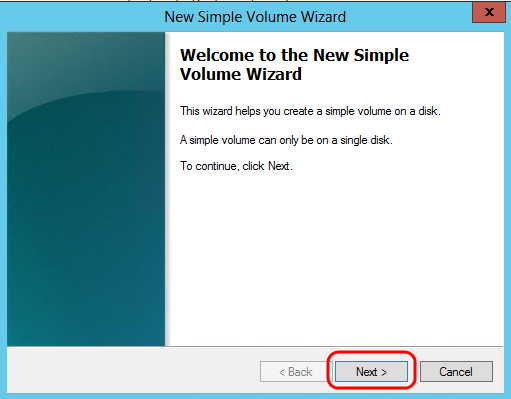
Right click on the unallocated disk (most likely Disk 2) and select New Simple Volume
Click Next on the welcome screen
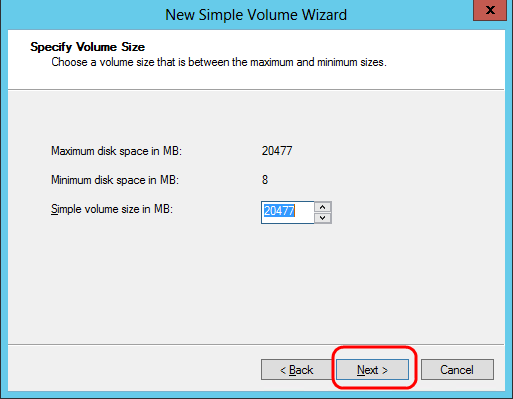
Accept the default values and press Next.
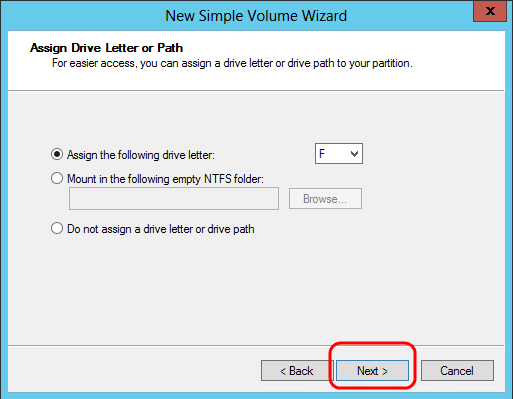
Assign a drive letter and click Next.
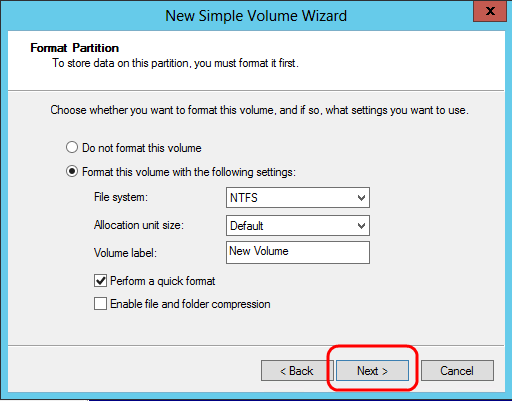
Format the partition and click Next.
On the final screen review the settings and click Finish.
Once done you will have a nicely formatted disk ready to be put to use.
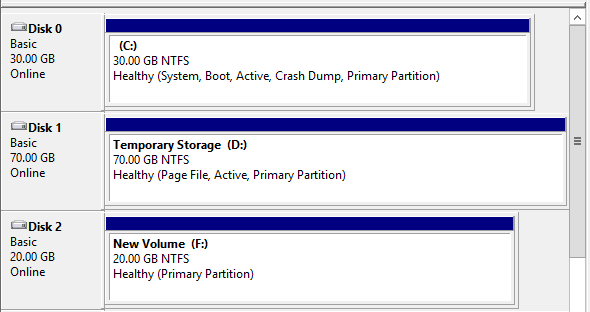
Viewed from the Disk Manager
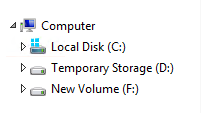
And the file explorer
You need to preform the same steps for the second domain controller, so open a remote desktop connection into SP-DC2 and repeat the above steps.
The next thing to do is promote the server to a domain controller. The procedure for doing this has changed slightly going from Windows Server 2008 to Windows Server 2012.
A good guild with additional references can be found here.
The first thing to do is install the Role Active Directory Domain Services.
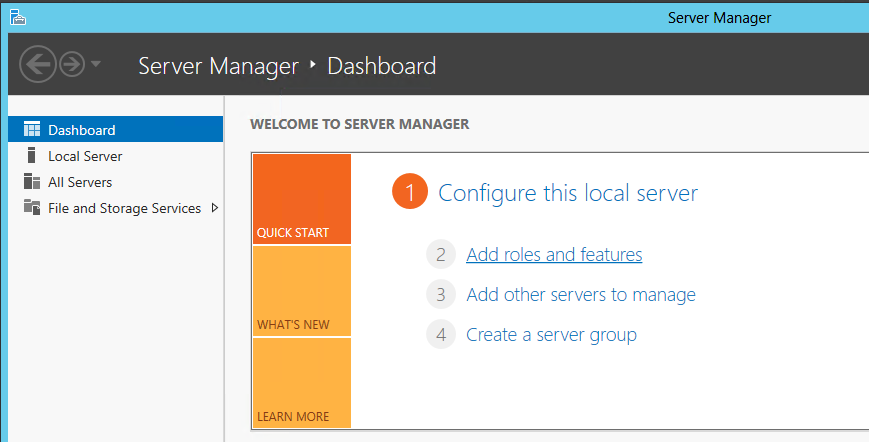
Open the Server Manager and select Add roles and features.
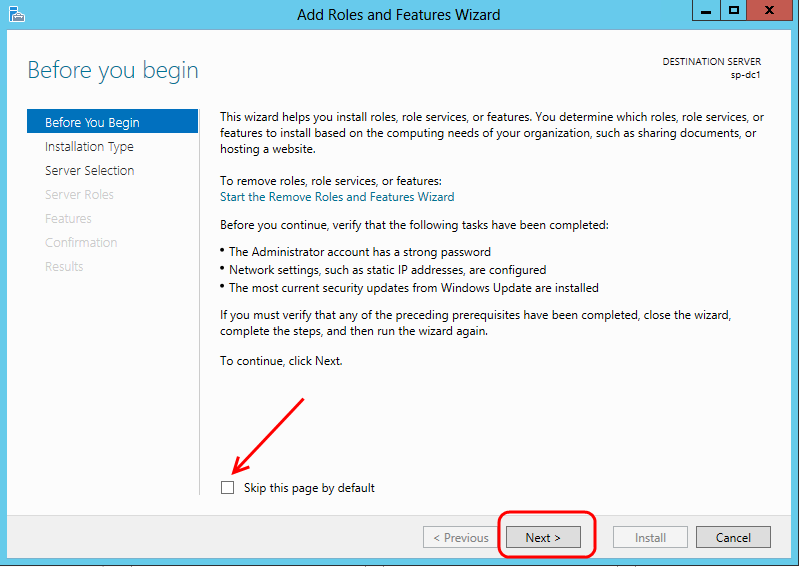
Click Next in the “Before you begin” dialog. You may want to check the “Skip this page” checkbox.
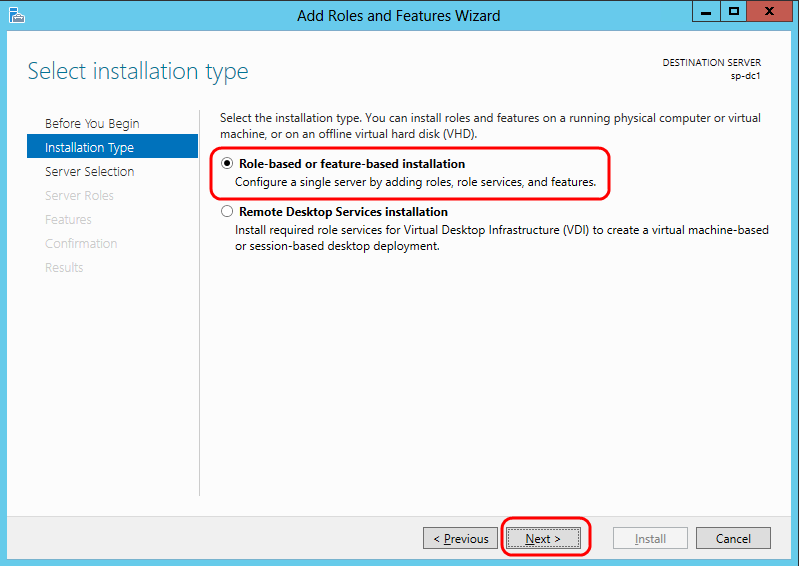
On the Select installation type ensure the first option is selected.
Select the local server as the destination server
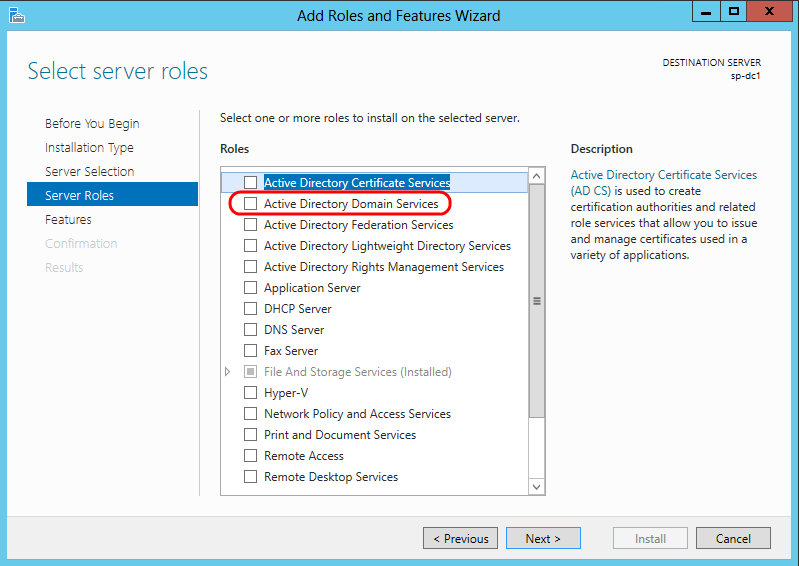
In the dialog for selecting roles, select the Active Directory Domain Services
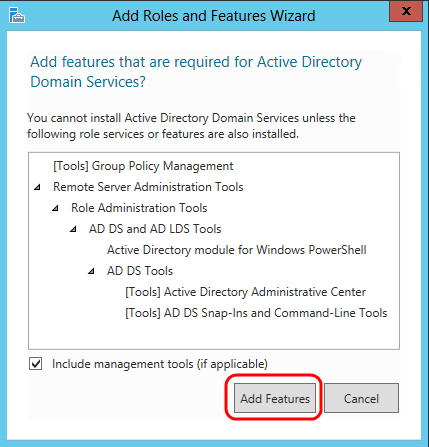
As soon as you make the selection the following dialog will pop up asking you add the required roles and features.
Click Add Features to accept.
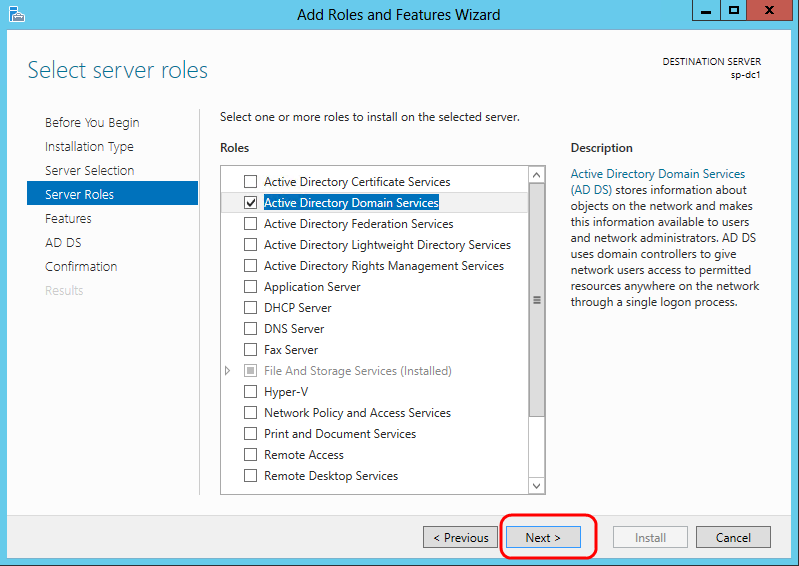
Ensure the Active Directory Domain Services is selected and click Next.
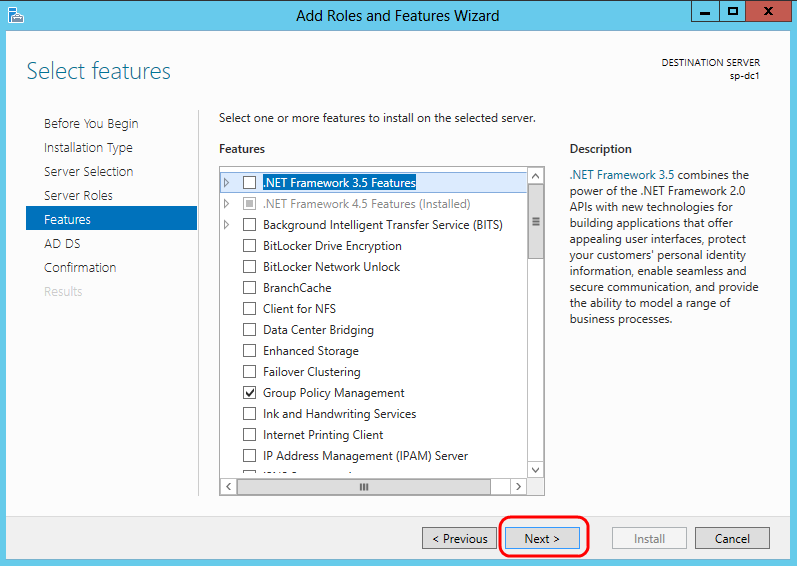
In the select features dialog just click Next.
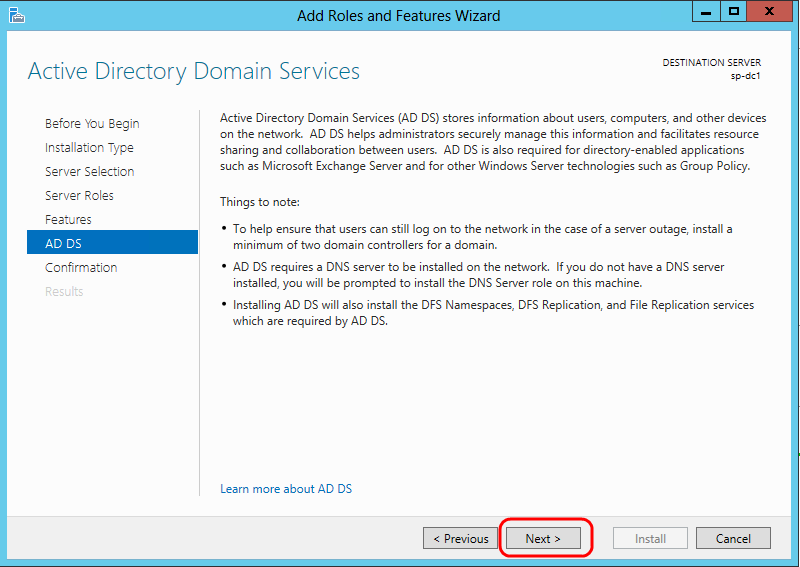
Click Next in the Active Directory Domain Services dialog.
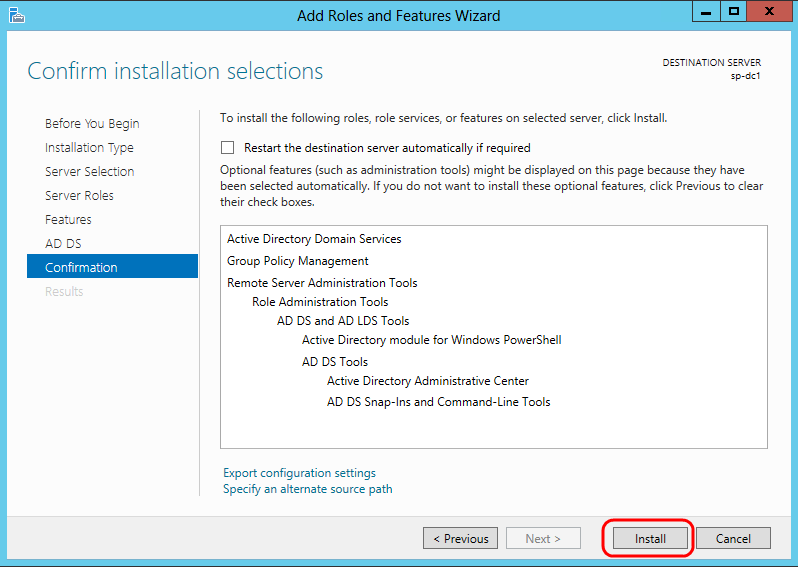
Confirm the different selections and click Install.
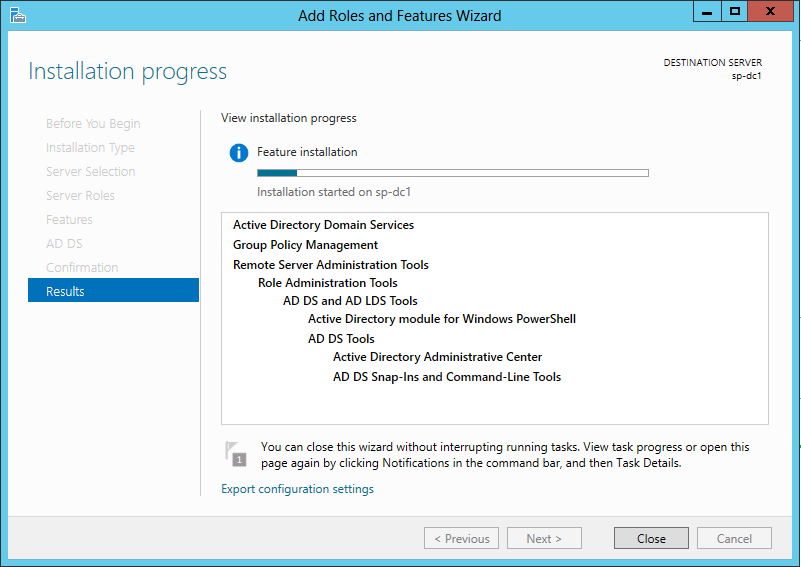
The installation will now commence and you can follow the process.
As stated in the dialog you can close the wizard.
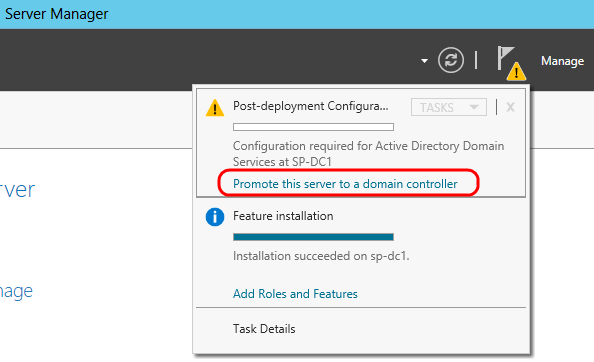
Once the installation process is complete you will be notified in the Server Manager.
Click the Promote this server link to promote the server to a domain controller.
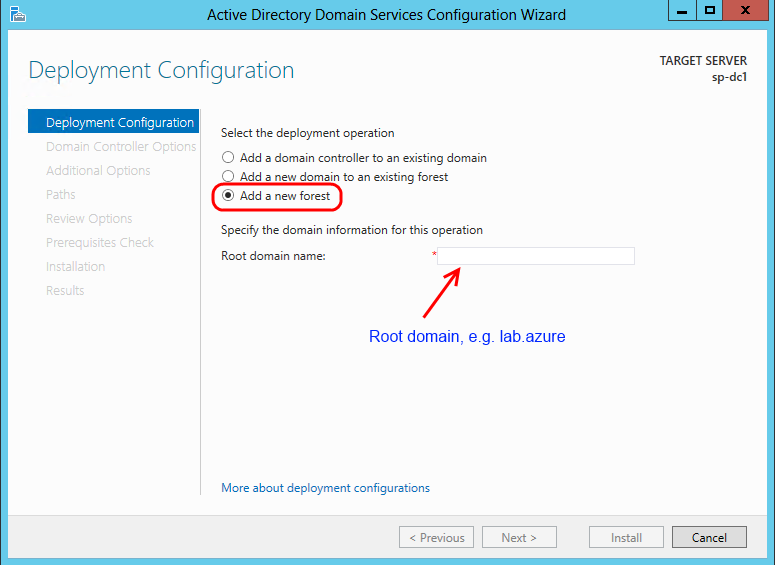
This will start the AD DC Configuration Wizard.
Select Add a new forest and enter the Root domain name. Once the name is entered the Next button can be pressed.
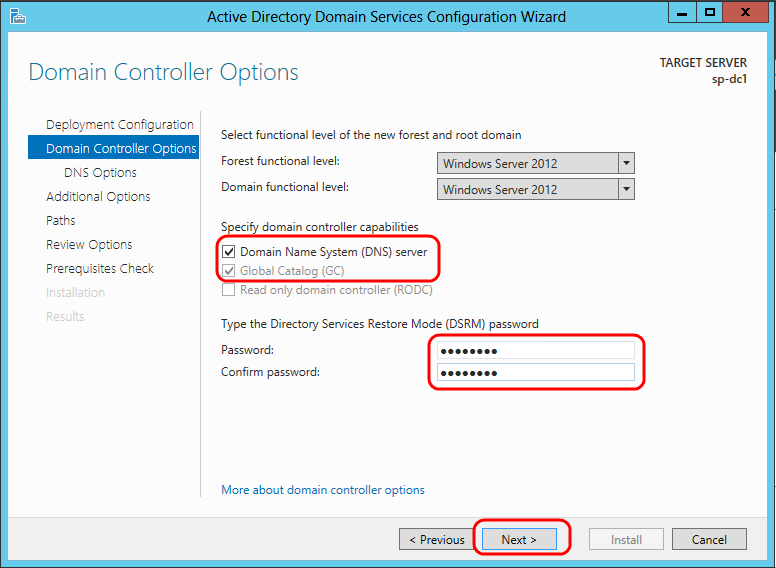
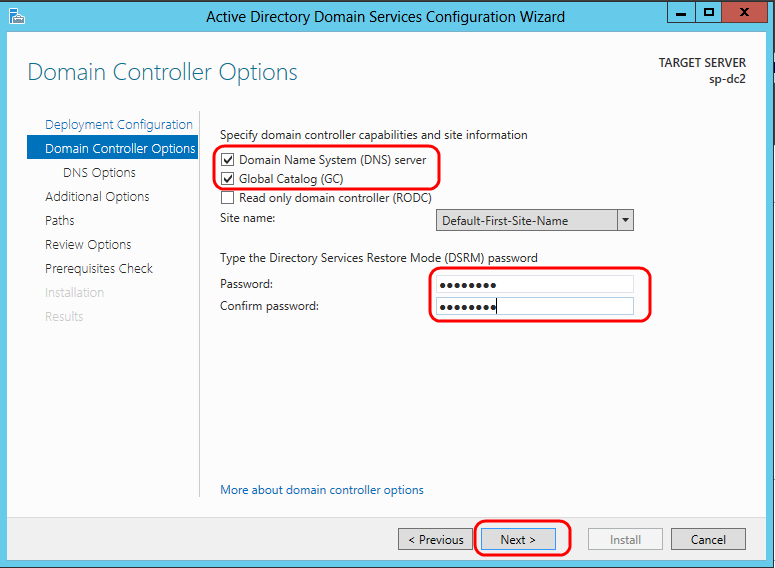
Set the different Domain Controller Options and enter the DSRM password. Then click Next.
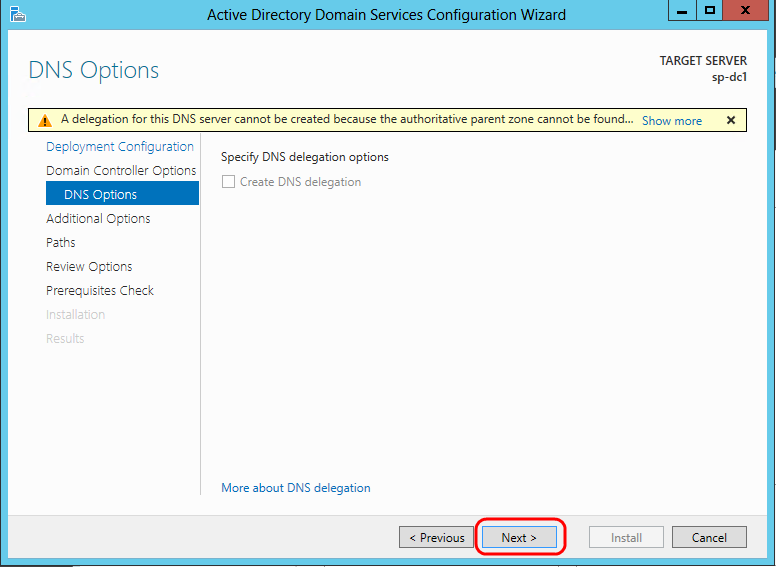
Click Next in the DNS Options dialog.
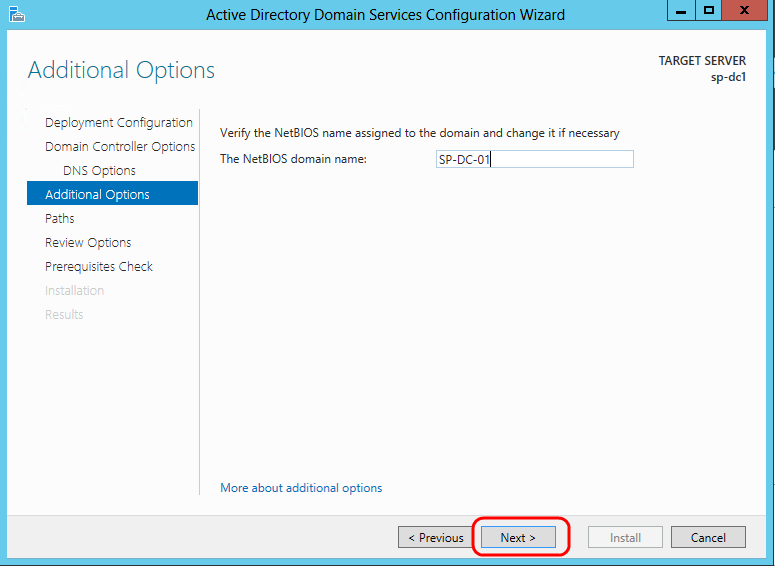
In the Additional Options dialog enter the NetBIOS domain name and click Next.
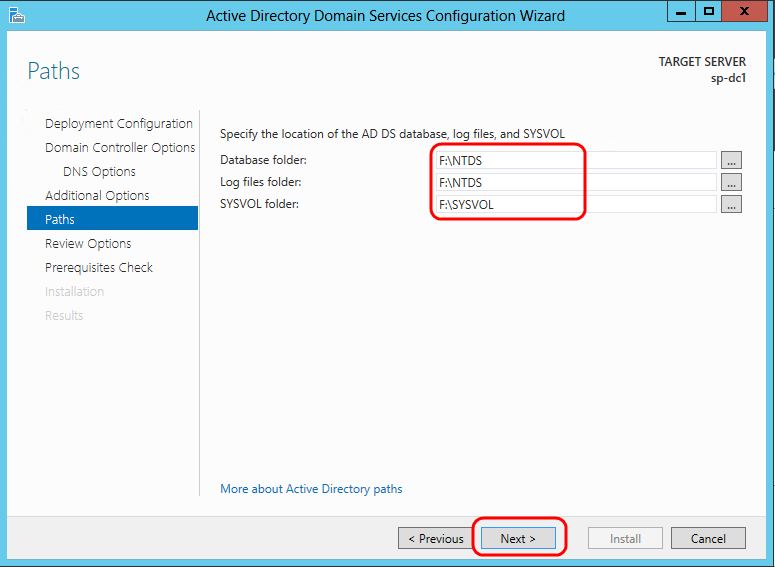
In the Paths dialog you have to select the location of the AD DS database, the log files and the SYSVOL. I have placed them on the extra disk we instantiated above. Click Next afterwards.
You can review the options and selections you have made in the dialog before actually starting the process. When satisfied, click Next.
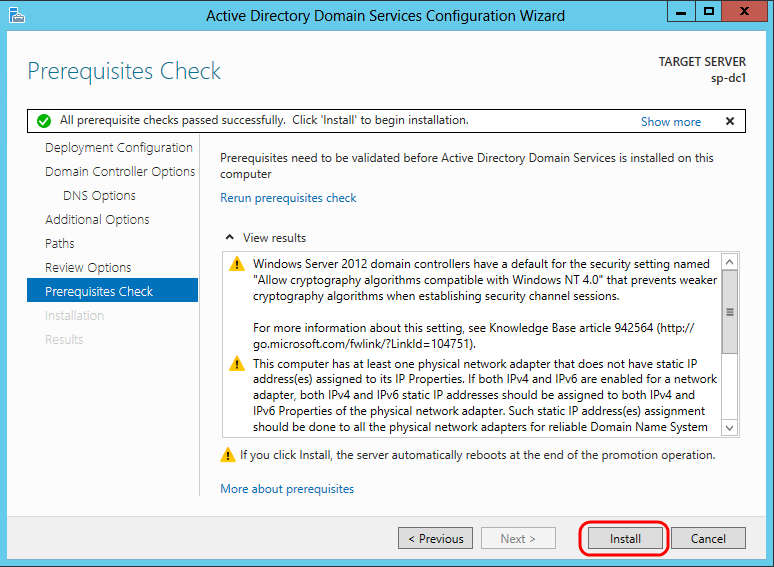
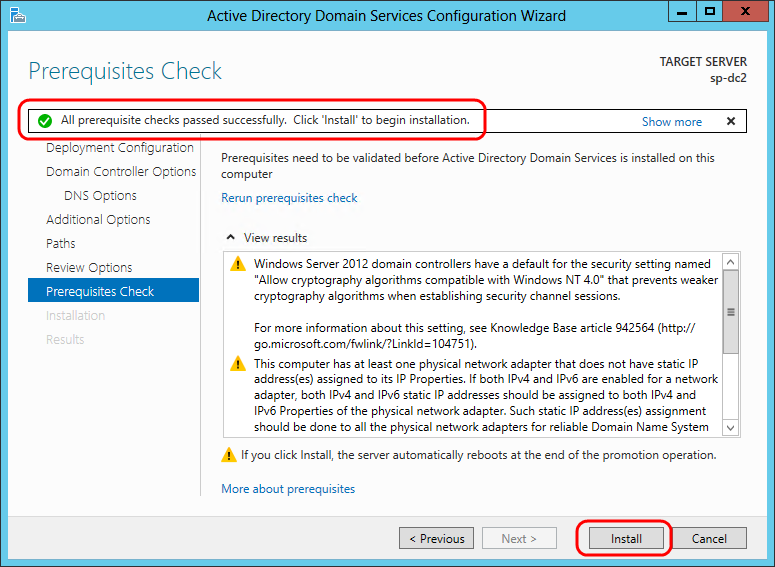
Before the system will promote the server to a domain controller it will perform a number of prerequisites checks. If all looks good, press Install.
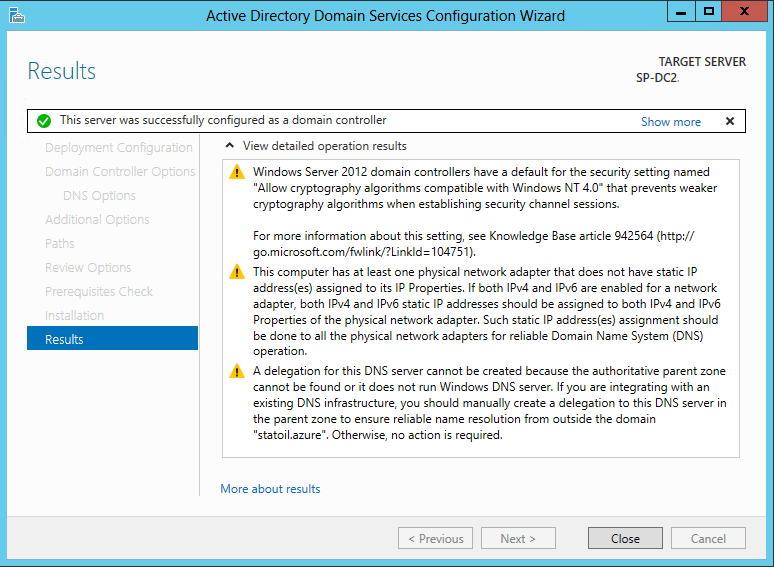
The server will reboot once the installation process is finalized. When it is up again you can log in with your AD credentials.
How that you have a running domain controller you can add the second one to the forest to ensure redundancy.
The first initial steps are the same: attach and format disk and install the Role Active Directory Domain Services. Once this is done promote the server to DC.
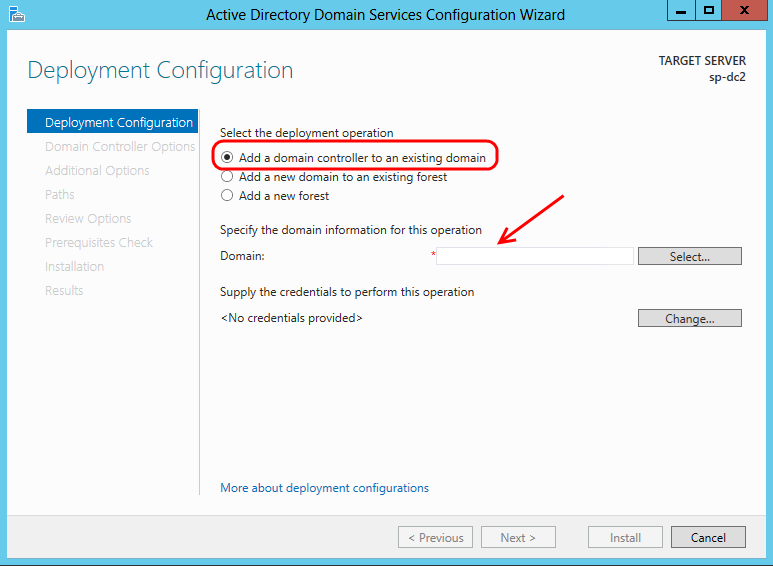
When you get to the Deployment Configuration you should not add a new forest, but add a domain controller to an existing domain.
Enter the domain name you specified during the configuration of the primary domain controller and click Next.
Select options and enter credentials; then press Next.
Click Next in the DNS Options dialog.
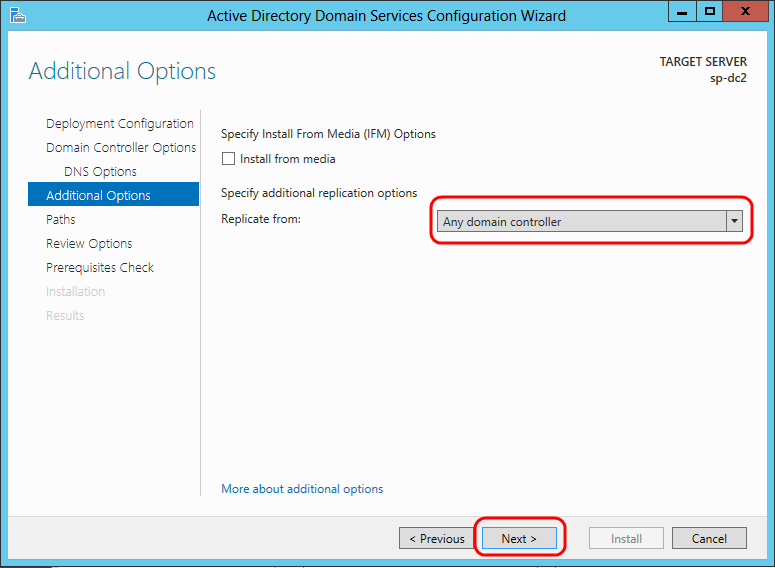
In the Additional Options dialog, select to replicate from Any domain controller and click Next.
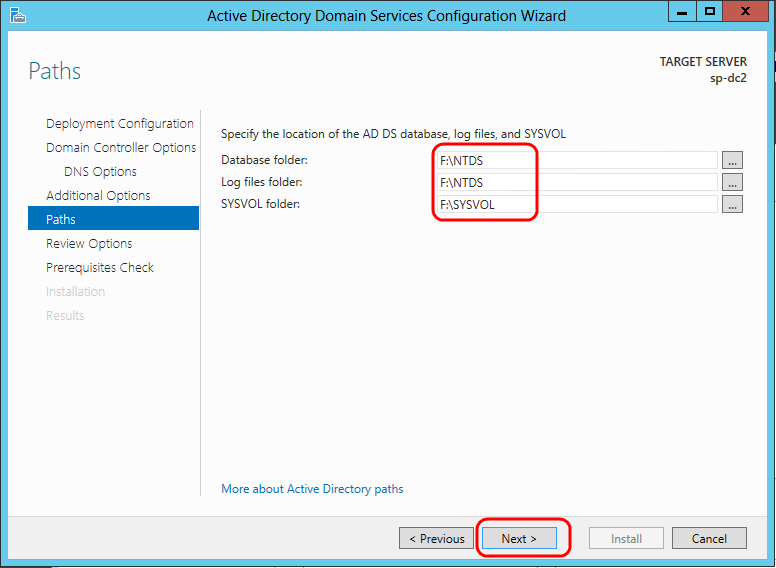
As was the case with the primary domain controller we place the database, the log files and the SYSVOL on the extra disk. Click Next after this has been set.
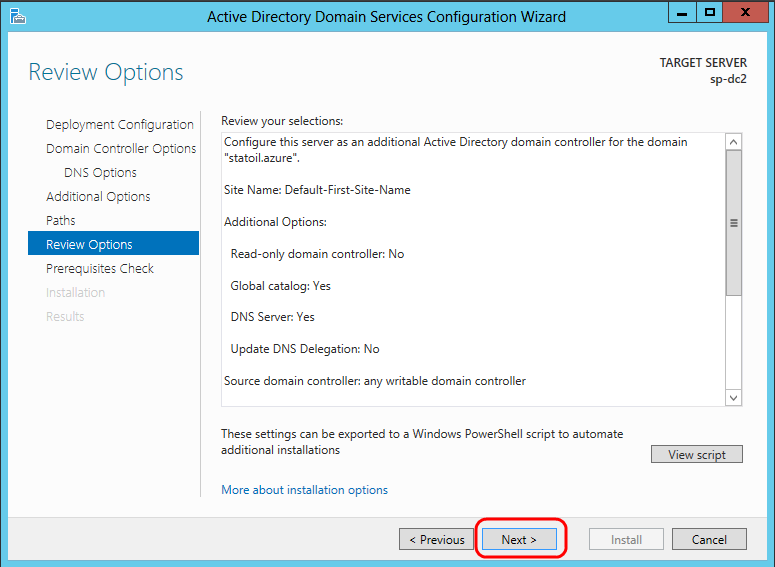
Review the configuration and click Next to perform the prerequisites check.
If all is green click Install to begin installation.
When done we now have two domain controllers and an active directory ready to be configured.
Again this turned out to quite a long post. As stated in the beginning most of the steps are really not Windows Azure specific.
This stresses a very important point, namely that running a virtual machine in Windows Azure is just as easy as running a virtual machine on-premises or at a remote branch office.
We have now in a number of posts worked our way toward the main script or workload: creating the remaining 7 virtual machines that together with our two domain controllers will make up our SharePoint farm/environment.
The next post will focus on the PowerShell script to do this. It will turn out to be very similar to the one used above.


